
Significant Google Assistant ‘Updates’ feed revamp appearing for more
An Android device with the Google Assistant application installed An ESP8266/NodeMCU board A 5V power source A basic understanding of Arduino programming Step by Step Guide Step 1 Create a new project in your Google Developer console. From the top header navigation, select Create a Project. Step 2

Google Assistant Ifttt Adafruit, HD Png Download vhv
Google assistant is AI (Artificial Intelligence) based voice command service. Using voice, we can interact with google assistant and it can search on the internet, schedule events, set alarms, control appliances, etc. This service is available on smartphones and Google Home devices.
Ritoccare E così via ereditare arduino google home mini Fantasia
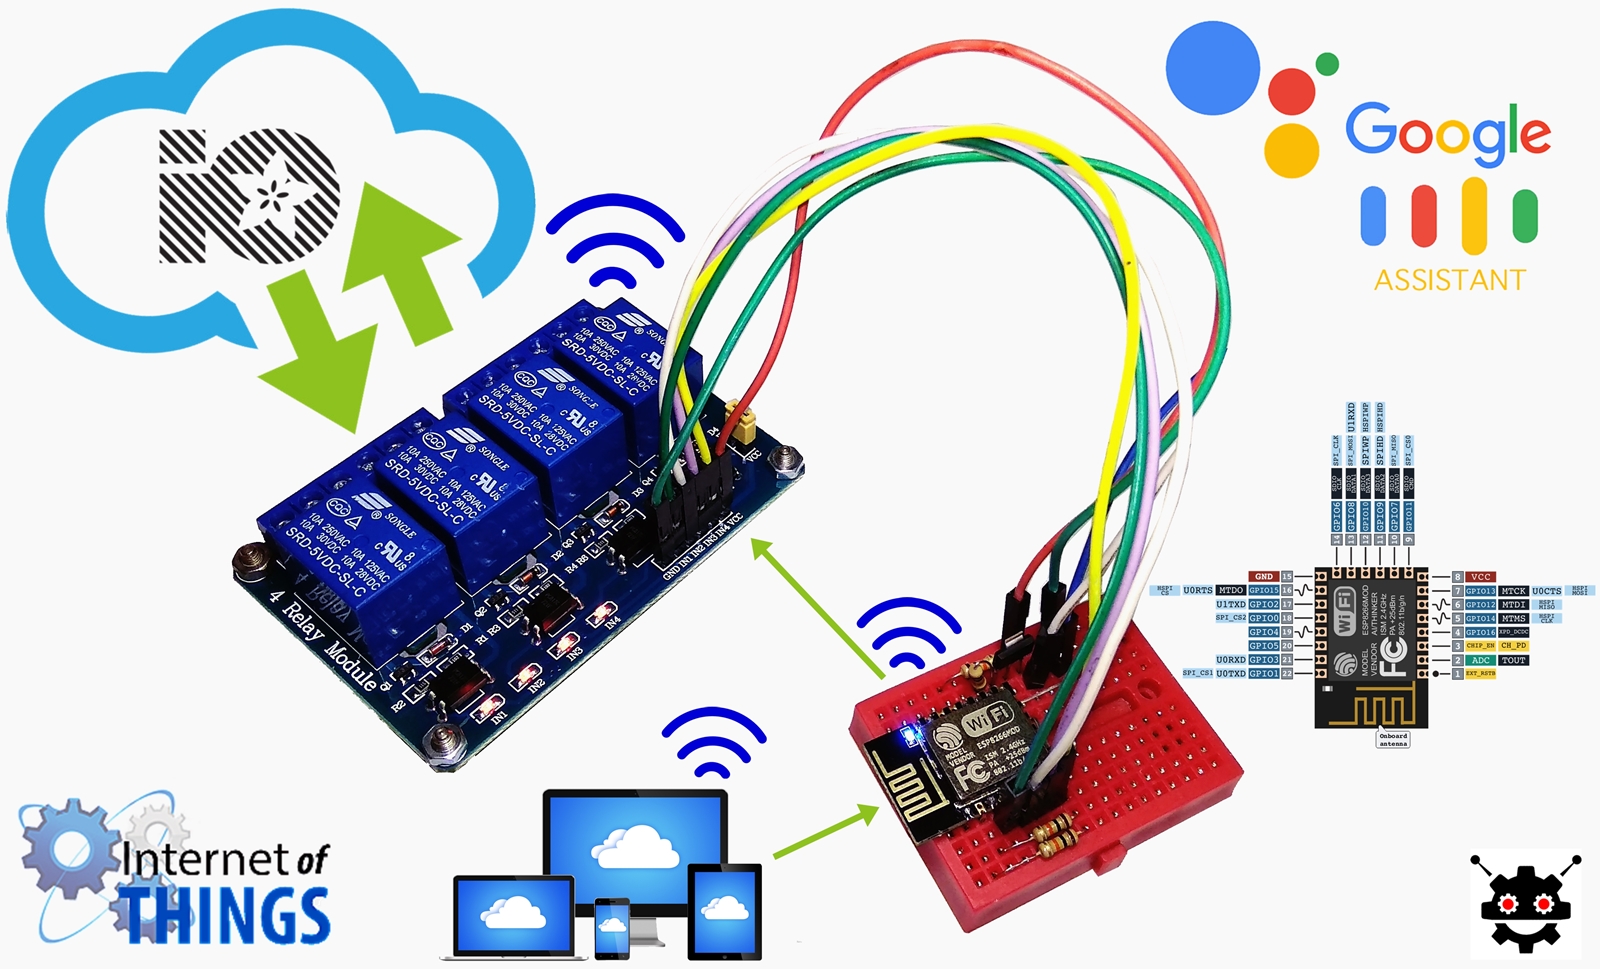
Setting up Arduino IDE to control LED using ESP8266 and Google Assistant Adafruit IO Introduction This time we will show you another interesting application where we will be able to control any output connected with the ESP8266's GPIO pins through voice commands. We will use Adafruit IO which is free cloud-based software built around MQTT protocol.
Control Esp32 Outputs Using Google Assistant And Adafruit Io Vrogue
Google Assistant Setup Here are the steps to configure Google Assistant with IFTTT. You will need to create two applets, one to turn on the lights and the other to turn off the lights. Click "This" to create the first half of the applet. Search for and select "Google Assistant". Don't be tempted to select Adafruit yet!

Home Automation using Google Assistant and Adafruit IO Home
Home Assistant is an open source home automation software which tracks the state of the smart-devices in your home so you don't have to. It easily integrates with most smart-devices (Google Cast, Philips Hue, Nest, Sonos, etc) and even interfaces with smart-assistants like Alexa or Google Assistant.
GitHub Jeffin28/GOOGLEASSISTANTADAFRUITESP8266
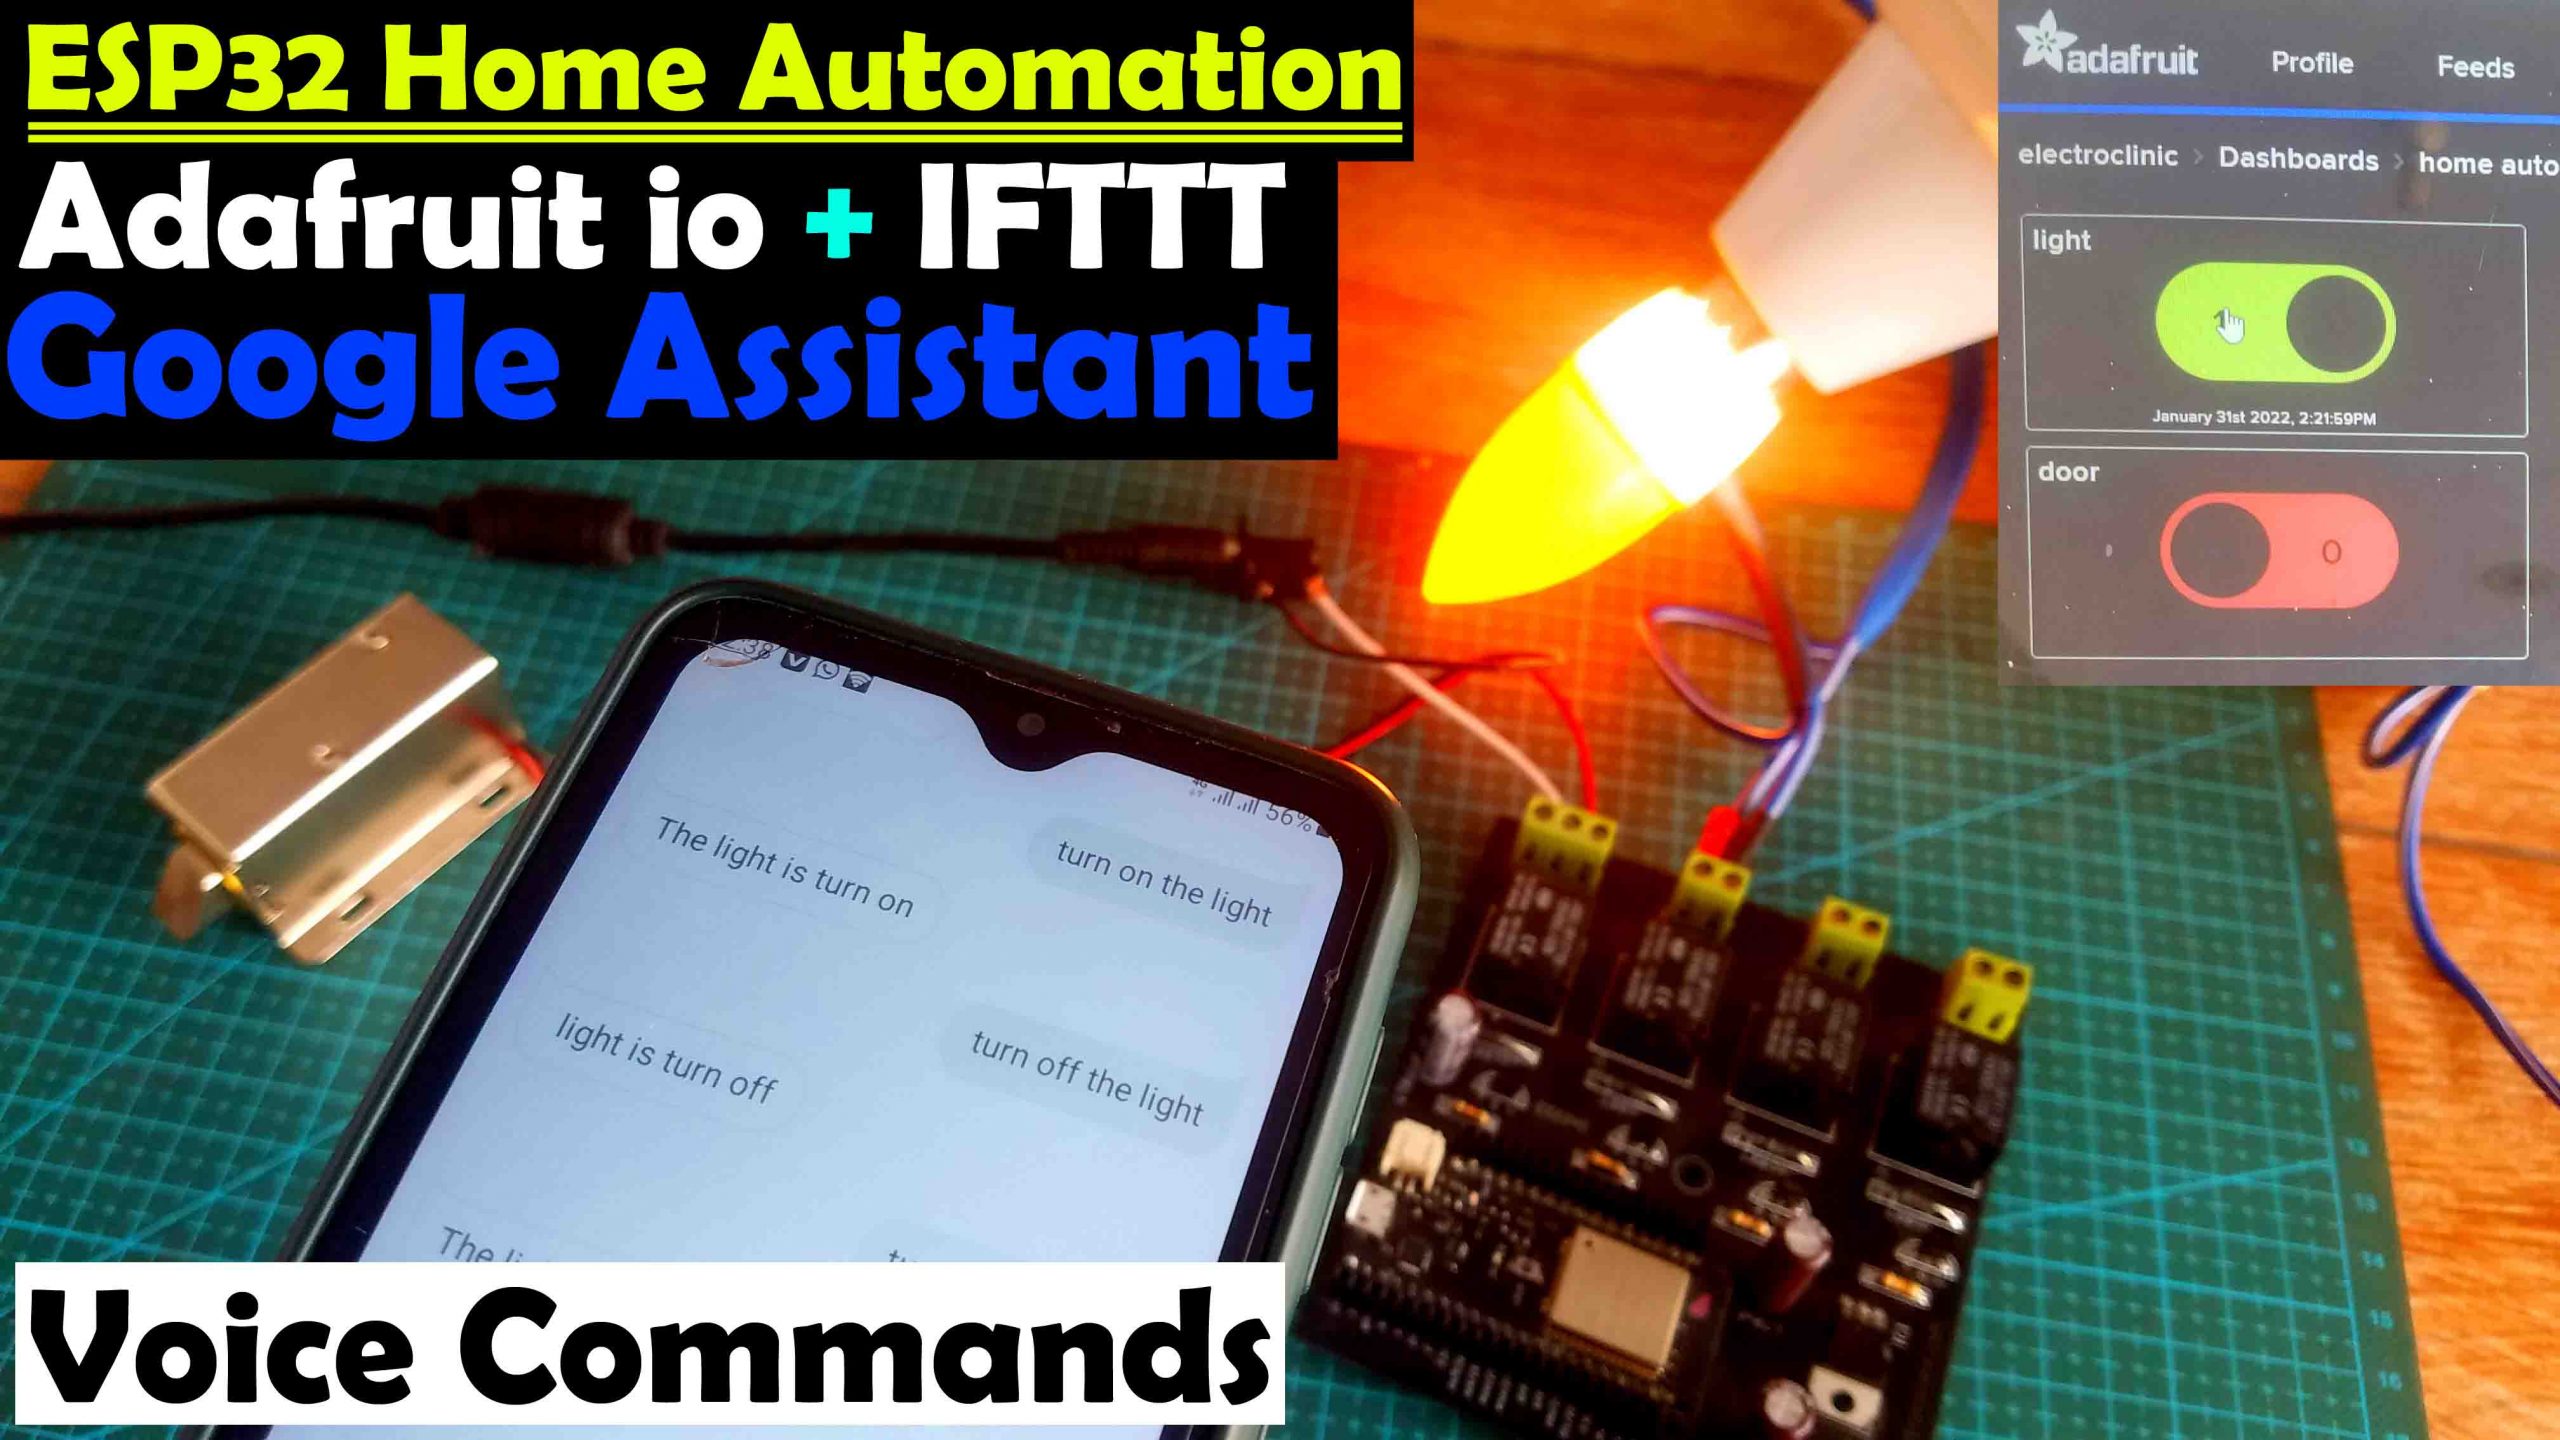
ESP32 with Google Assistant and Adafruit IO via Arduino IDE December 2, 2021 by microdigisoft In this tutorial, we will learn how to use Google Assistant and Adafruit IO API with ES32 Board using Arduino IDE. Under this project, we will control the ESP32 GPIOs remotely using Google Assistant application installed on your Android or iOS smartphone.

Home Automation Using Google Assistant Adafruit IFTTT NodeMCU
Google 220 get temperature by ribyatgeofrey 42 Useful Adafruit and Google Assistant integrations Triggers (If this) Monitor a feed on Adafruit IO This Trigger fires anytime it validates the data that you send to your feed. Example: If Feed Temperature > 80, fire Trigger. Activate scene

Home automation by google Assistant using Node MCU Connect ADAFRUIT
Adafruit IO Introduction This time, we will show you another interesting application where we will be able to control any output connected to the ESP32's GPIO pins through voice commands. We will use Adafruit IO, which is free cloud-based software built around the MQTT protocol.
Membuat Google Home menggunakan Chip ESP 12E Arduino 4 Channel Relay
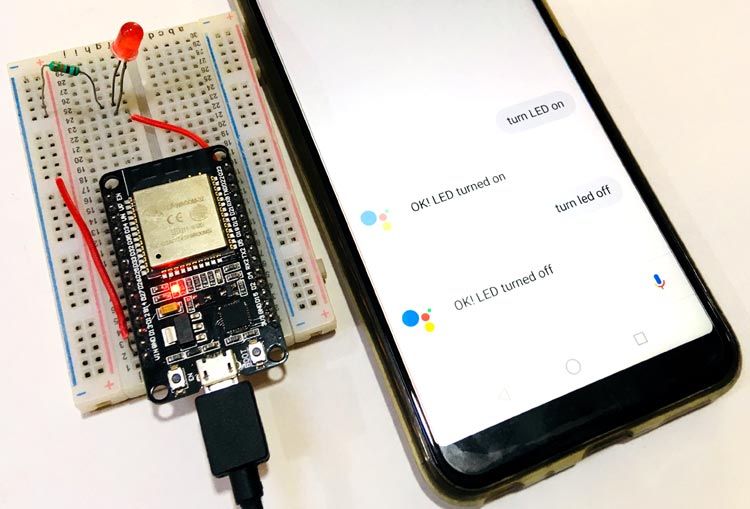
Google Assistant with Adafruit IO to control an LED with ESP32. Here we have used IFTTT to access Google Assistant and to control LED by voice commands. ESP32 has been programmed using Arduino IDE. Google account- same account for which you are using Google Assistant. Step1: Setting up Adafruit IO Account for IOT controlled LED

IFTTT Google Assistant Voice and Adafruit io based Home Automation
In this tutorial, we will walk you through setting up the Google Assistant API. Once that's all set up, you can install a few library, enable permissions and get the Google Assistant running on the Pi. Now you can ask Google what you want with the simple push of a button. Parts There are a few basic parts that are needed for this project.
ESP32_WiFiADAFRUITAsistente de Google (Google Assistant) YouTube
Overview Google Setup Usage Featured Products Single page Download PDF Feedback? Corrections? Overview Have you ever thought about setting up your own Google Assistant device that you can customize? With the Raspberry Pi and BrainCraft HAT, you can do just that. In this tutorial, we will walk you through setting up the Google Assistant API.
IFTTT Google Assistant Voice and Adafruit io based Home Automation
The Using Google Assistant on the BrainCraft HAT or Voice Bonnet guide has been updated to reflect some changes Google made to the setup process as well as code changes that prevented it from running on the latest Bullseye release of Raspberry Pi OS.

Controlling Home Appliances with Google Assistant and Adafruit IO IoT
Our guide walks you through the integration of ESP8266 with Google Assistant and Adafruit IO using the Arduino IDE. we provided code facilitates a seamless integration of the ESP8266 with Adafruit IO, allowing you to control GPIO remotely based on MQTT messages. With a thorough breakdown of the setup process, accompanied by insights into.
LED Blink using Google Assistant Node MCU Adafruit IFTTT IOT
A Google Assistant enabled device (Apps available for Android and iPhone, or Google Home) A computer with access to the Internet While these are the only physical materials required, this tutorial also requires that you set up accounts on various websites, and install the Arduino IDE. Adafruit IO - Create a free account.
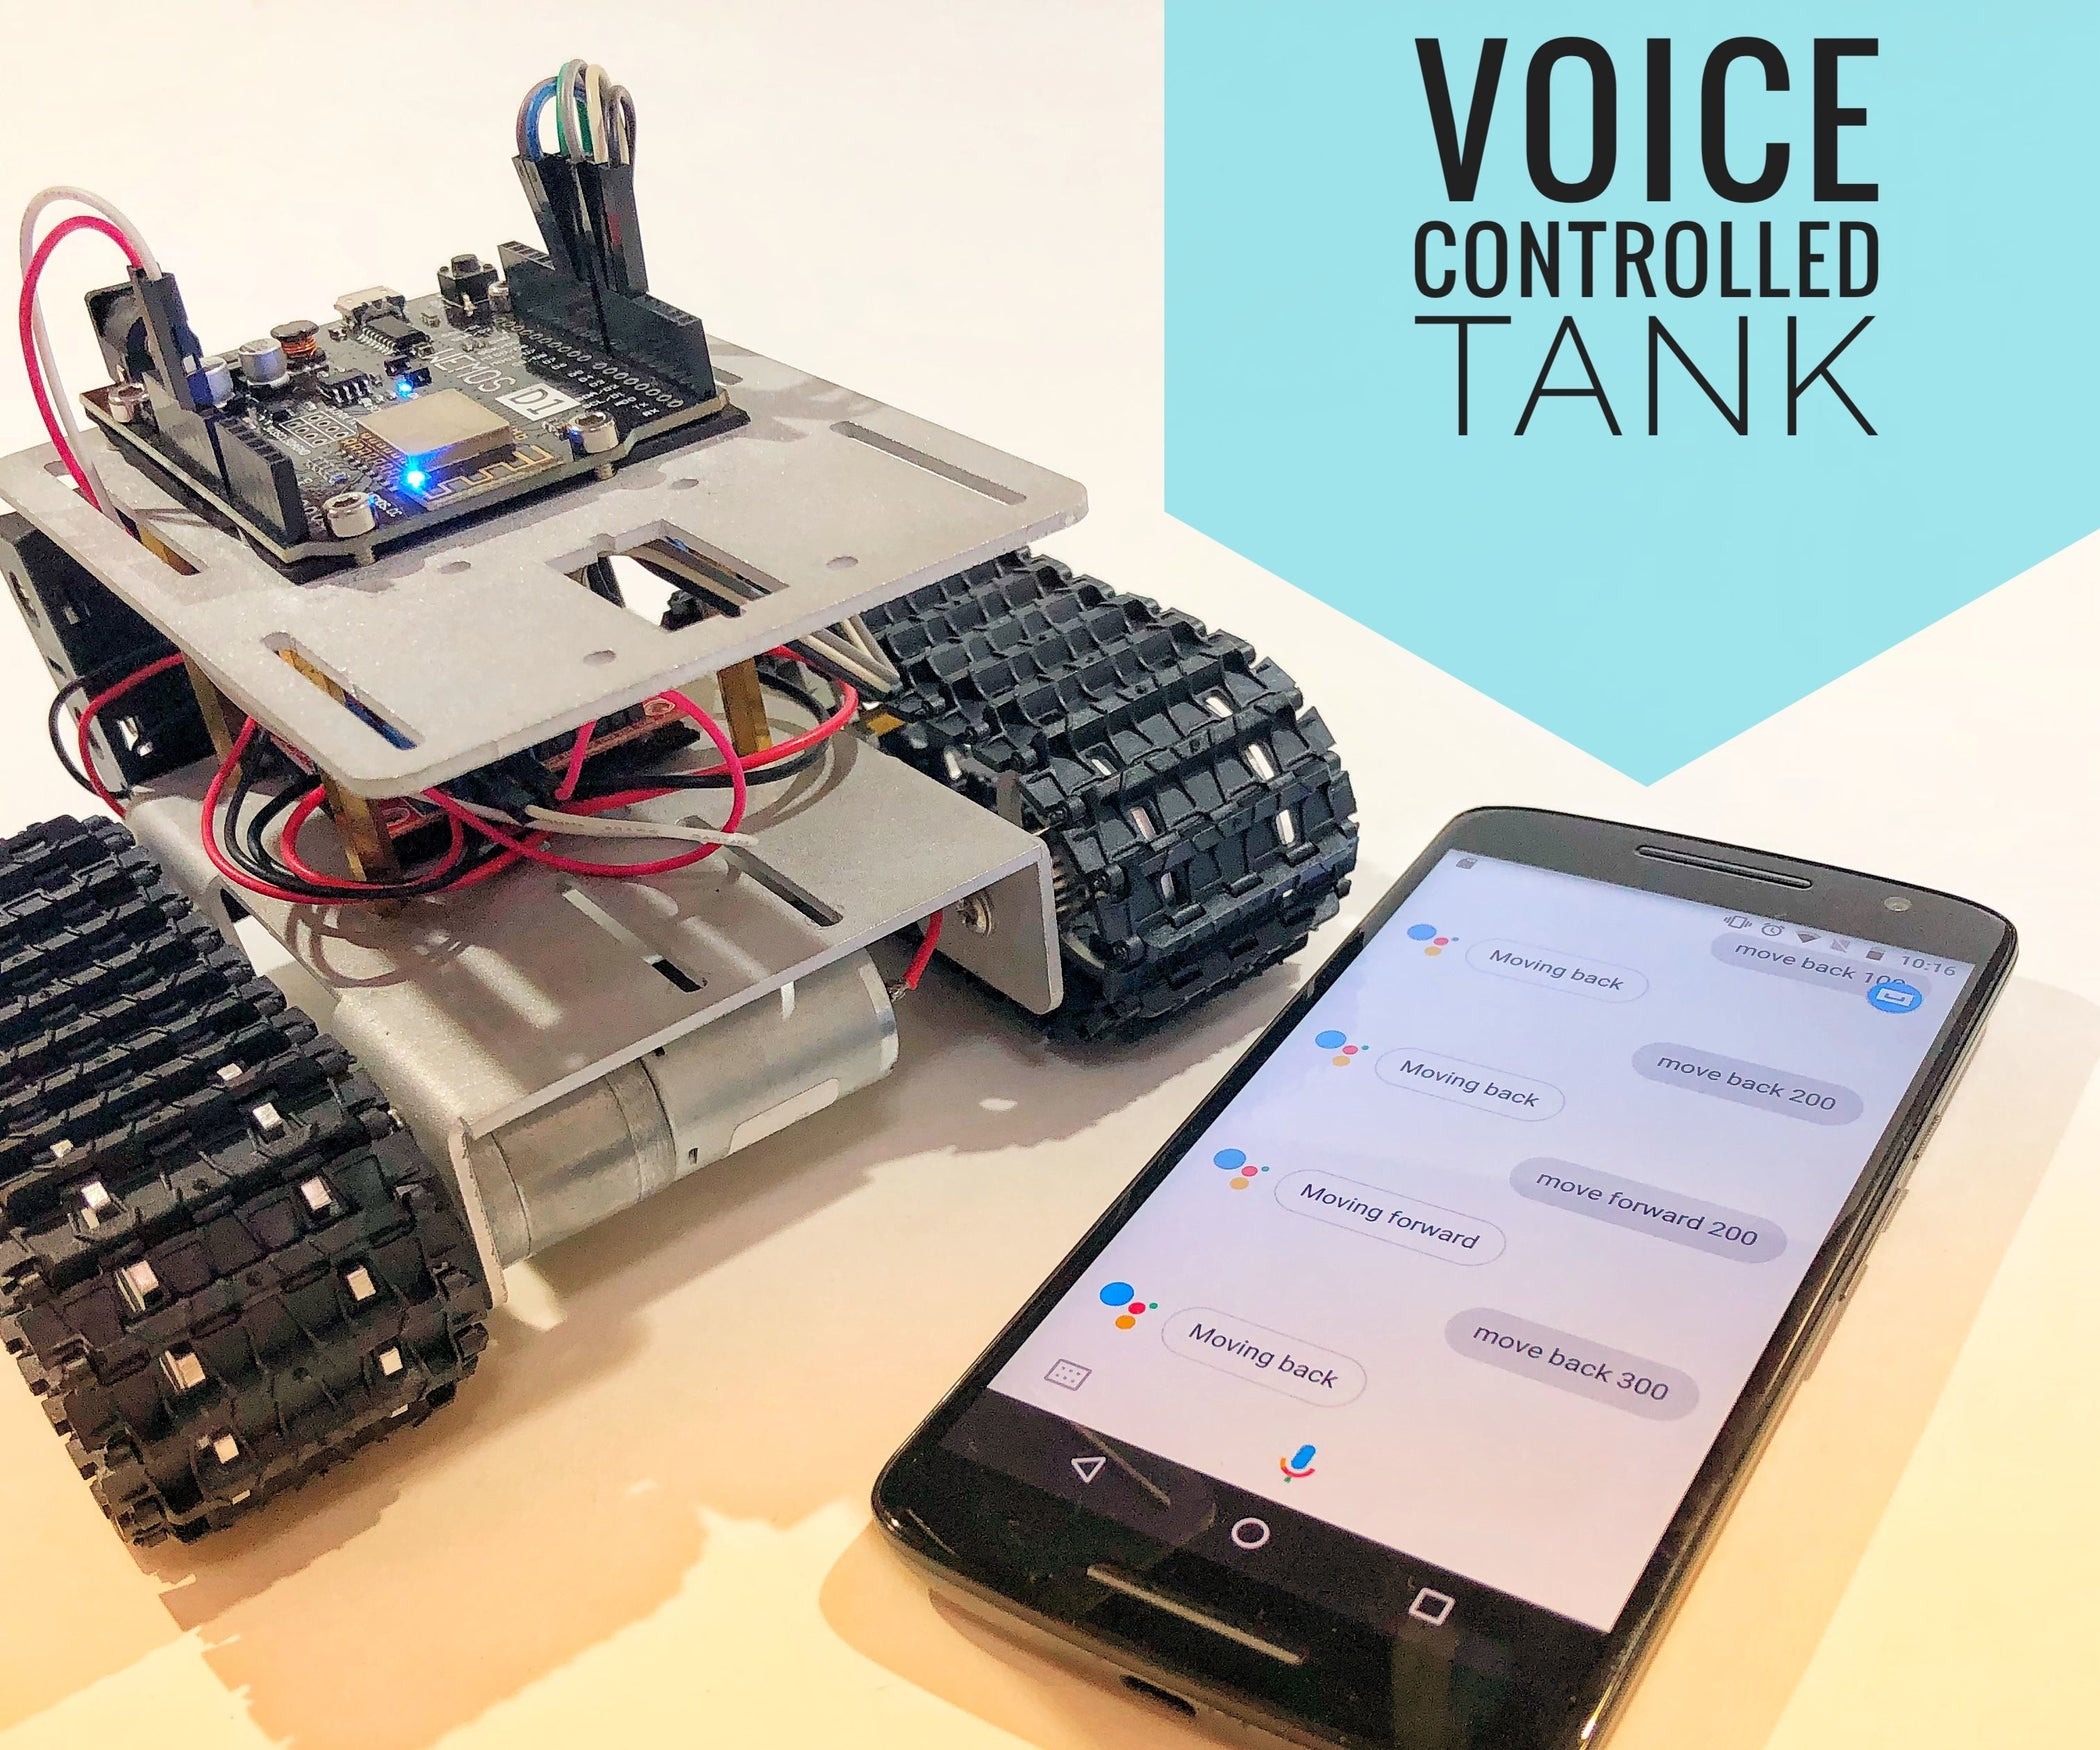
WiFi Voice Controlled Robot Using Wemos D1 ESP8266, Arduino IDE, IFTTT
February 14, 2020 AT 9:54 am Controlling Home Appliances with Google Assistant and Adafruit IO #IoT #AdafruitIO #GoogleAssistant @adafruitio @adafruit Techmirtz is controlling a 60W (not smart!) bulb using the Google Assistant voice-based command service. Adafruit IO, our free IoT service, has built-in integration with services like IFTTT.
Control ESP32 Outputs using Google Assistant and Adafruit IO
Step2. Connecting to Google Assistant through IFTTT. In this step, we will connect our Google Assistant to the Adafruit IO MQTT Broker to allow us to control the lights with voice commands. To do this I am using IFTTT (If This Then That) platform. To perform this you need to follow the procedure as per our previous article of Controlling LED.